Brief Summary
This video is a tutorial on how to make Amish white bread at home, designed for those who are new to bread making. It covers everything from the necessary ingredients and their substitutes to the step-by-step process of mixing, kneading, proofing, and baking. The tutorial emphasizes that bread making is forgiving and encourages viewers to try the recipe, promising delicious results.
- Simple recipe for beginners
- Step-by-step instructions for making Amish white bread
- Tips for kneading, proofing, and baking
Ingredients and Substitutions
To start, you'll need yeast, and while the instructor uses bulk yeast at a tablespoon and a half, a single package of Red Star or Fleshman's active dry yeast will work too, just ensure it's fresh. For oil, olive oil is preferred, but vegetable, canola, or avocado oil are suitable alternatives. Sugar is included to feed the yeast, but it can be omitted or replaced with the same amount of honey. Salt is essential for flavor, and about six cups of flour are needed, with options ranging from whole wheat to all-purpose or bread flour. You'll also need two cups of hot tap water, ideally around 110°F to avoid harming the yeast.
Activating the Yeast
Begin by pouring two cups of hot tap water into a mixing bowl, then add either one package of store-bought yeast or 1.5 tablespoons of bulk yeast. Incorporate 1/3 cup of sugar to feed the yeast, mixing well to dissolve. Allow the mixture to sit and bloom, which means the yeast will activate and become frothy, indicating it's alive and ready for the next steps. It’s important to ensure the yeast is active before proceeding to avoid wasting ingredients. If the yeast doesn't bloom, consider making fry bread instead of discarding the ingredients.
Mixing the Dough
Add 1/4 cup of oil to the activated yeast mixture. Gradually incorporate six cups of flour and 1.5 teaspoons of salt. While a mixer can be used, the instructor demonstrates mixing by hand to guide beginners. Use a Dutch whisk, wooden spoon handle, or rubber spatula to start combining the ingredients, then transition to kneading by hand.
Kneading the Dough
Knead the dough for about 8 minutes, folding it over itself and pushing down. If the dough sticks, add flour a little at a time. The goal is to develop the gluten, which gives the bread texture and structure. If hand kneading becomes tiring, a dough hook on a mixer can be used to finish the process.
First Proofing
Form the kneaded dough into a ball and place it back in the same bowl, ensuring it's coated with oil or cooking spray. Cover the bowl and let the dough rise in a warm place until it doubles in size, which can take one to two hours depending on the room temperature.
Shaping and Second Proofing
Once the dough has doubled, punch it down to release the air. Divide the dough in half and shape each piece into a loaf. Place the loaves in greased bread pans, cover them, and let them rest for about 30 minutes. During this time, preheat the oven to 350°F (175°C). The dough should rise almost to the top of the pans.
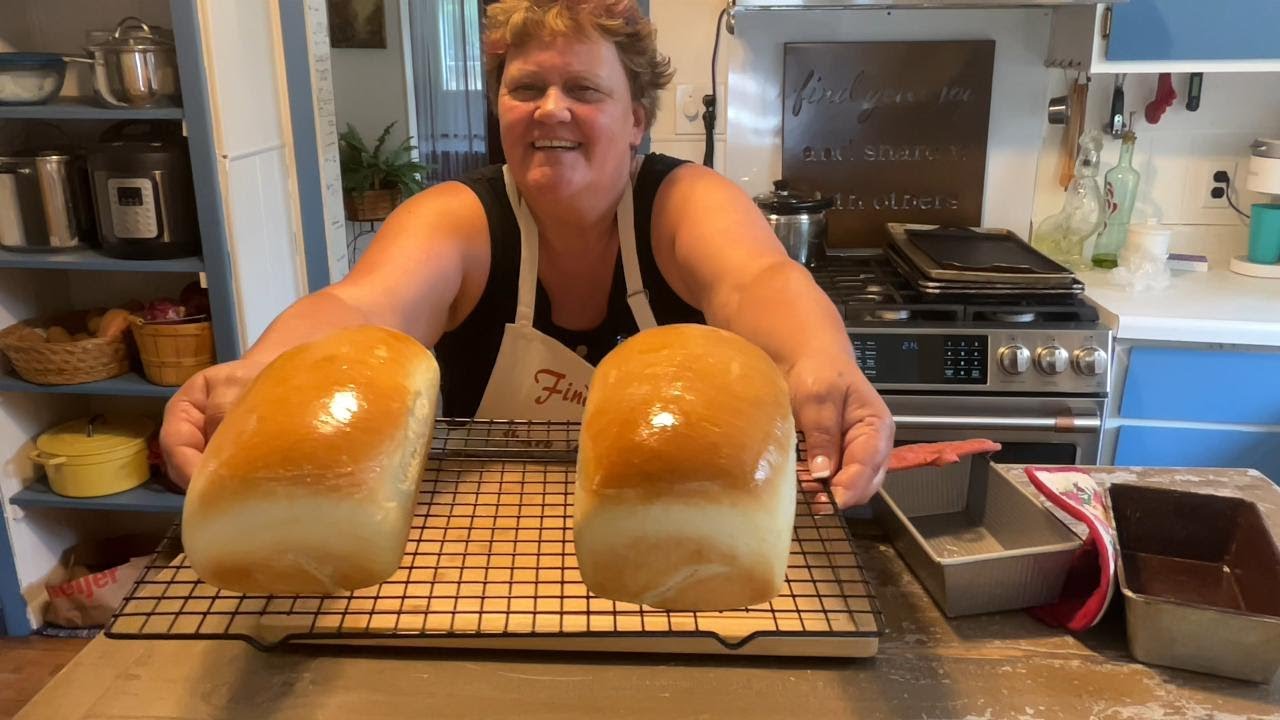
Baking and Finishing
Bake the bread for 30 minutes. To ensure it's done, the internal temperature should be 190°F (88°C) or slightly higher. After baking, brush the tops with butter for added flavor and a soft crust.
Cooling and Tasting
Remove the loaves from the pans immediately and let them cool for at least 15 to 30 minutes before slicing. The finished bread is described as soft, flavorful, and perfect for sandwiches or toast. The video concludes with a taste test, highlighting the bread's excellent texture and taste.

