Brief Summary
In this video, Daniel from Sound Headquarters details the process of upgrading drum lesson rooms by replacing old acoustic panels with new low-profile, beveled edge panels. The project focuses on a budget-friendly solution with an emphasis on both aesthetics and functionality. Key steps include constructing frames, applying insulation, and installing the panels securely to enhance sound quality.
- Daniel replaces old acoustic panels with new ones.
- The upgrade involves detailed construction and installation processes.
Introduction to the Project
Daniel introduces the project, highlighting the transformation of drum lesson rooms by installing new acoustic panels. The goal is to provide a budget-friendly solution that enhances the visual appeal and sound quality of the rooms.
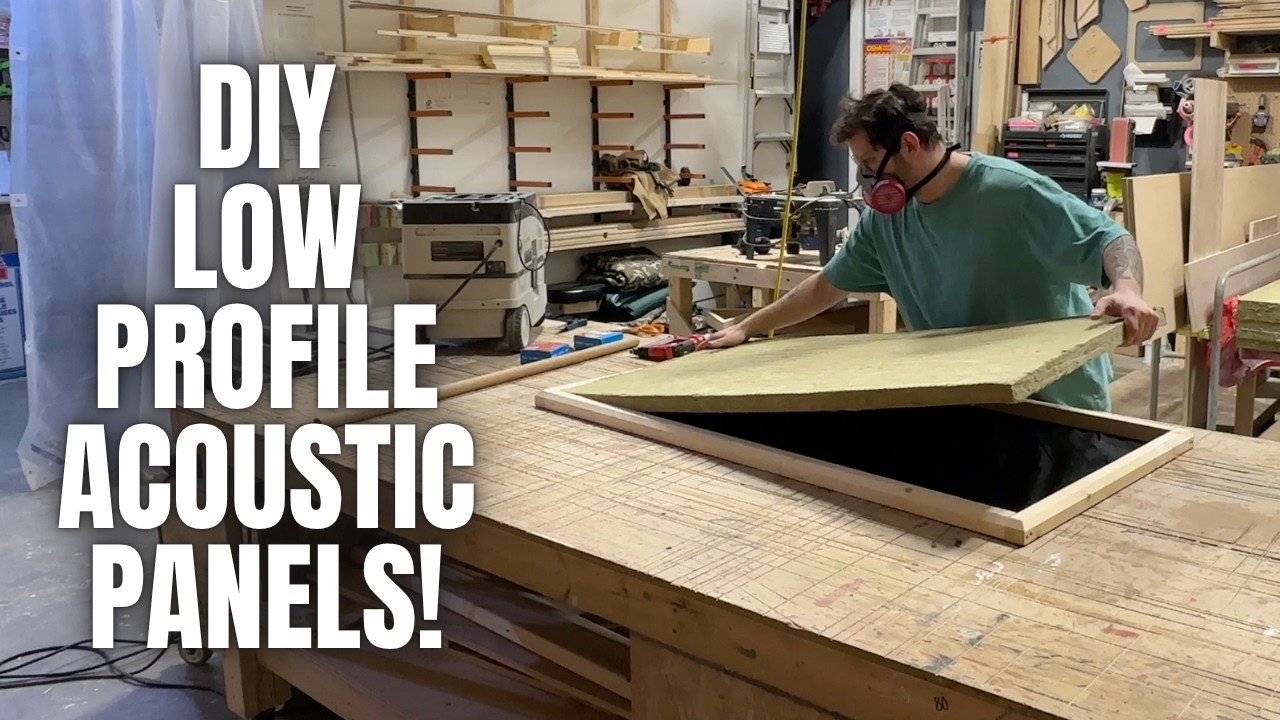
Constructing the Acoustic Panels
The construction begins with cutting 2 by 2 lumber into precise measurements for the frames of the acoustic panels. This includes marking and ensuring consistent cuts to create identical pieces for each panel. Daniel uses a stop block to maintain accuracy and employs countersink screws to secure the panels.
Routing the Edges
Using a router with a 45° chamfer bit, Daniel shapes the edges of the frames to give them a professional beveled appearance. Two passes on each side ensure a clean edge, which enhances the overall aesthetic of the finished panels.
Preparing the Frame for Insulation
Before adding insulation, Daniel performs light sanding on the frames to eliminate any rough edges. A breathable, lightweight landscaping fabric is attached to the back, acting as a barrier for the insulation and ensuring it stays intact.
Adding Insulation and Covering
Rockwool Comfortboard 80, a rigid mineral wool insulation, is selected for the panels due to its low profile. Daniel emphasizes the importance of keeping the dimensions snug to save space. After applying packing tape at the joint areas, he layers canvas over the insulation as a final cover, securely stapling it in place.
Installing French Cleats
After completing the panels, Daniel prepares for installation by adding French cleats to the back of each panel. These cleats allow for easy hanging and adjustments once the panels are mounted on the walls. He ensures the cleats are level to guarantee that all panels align properly.
Removing Old Panels
Daniel assesses the existing drum rooms, identifying the need to remove outdated, sagging panels. He takes down the old hardware, such as metal French cleats, and prepares the walls for the new installations.
Installing New Panels
Using a laser level for alignment, Daniel installs the new panels by drilling holes for drywall anchors. He carefully screws the anchors into the wall to avoid over-tightening, ensuring a secure fit for the cleats. The panels are then hung, providing a modern and cohesive look.
Final Touches and Reveal
After completing the first drum room, Daniel moves on to a second room that shows more wear. He follows the same process: removing old fixtures, marking new locations for the French cleats, and installing the new panels with an emphasis on a clean finish. The video concludes with shots of the transformed spaces.

